VPN Setup on macOS
A complete guide to setting up a VPN on macOS (Mac OS X).
V2Box (Recommended)
Download and Installation
- Open the App Store
- Search for the V2Box app
- Click Get and wait for the installation to complete
- After installation, open the app
Adding Configuration
- Copy the link you received earlier
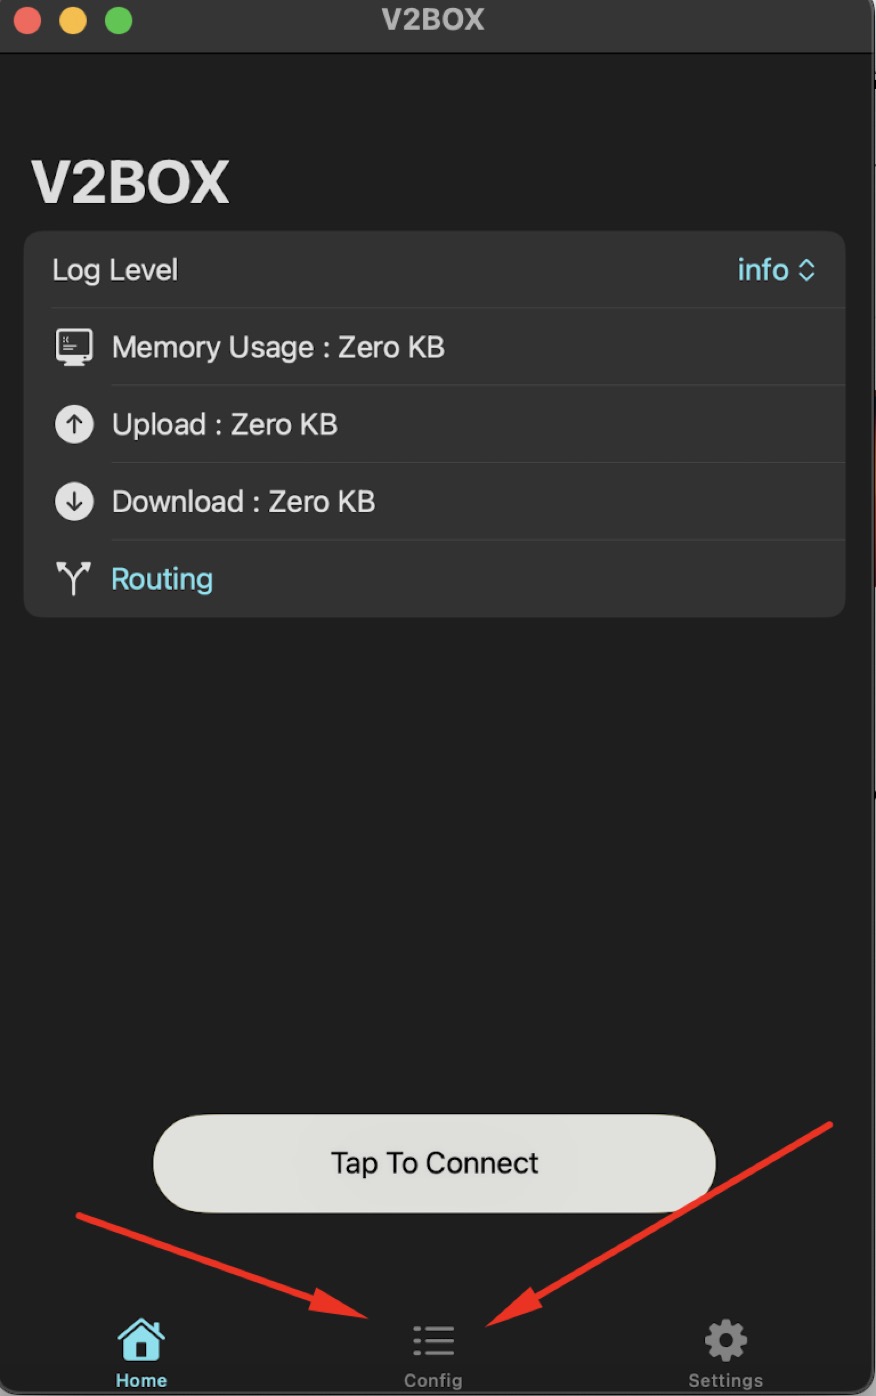
- When the client launches, you will see a panel where you need to click on “Config”.
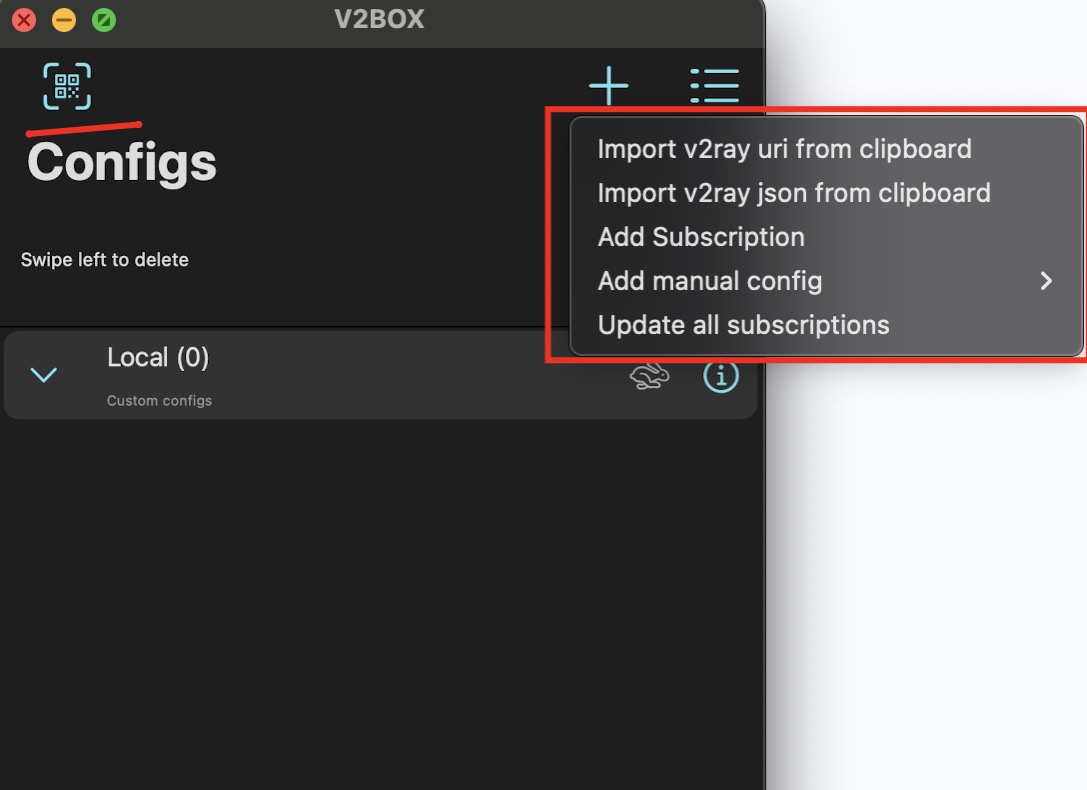
- In the opened “Configs” section, click on “+” to see available options for configuring the required proxy protocol.
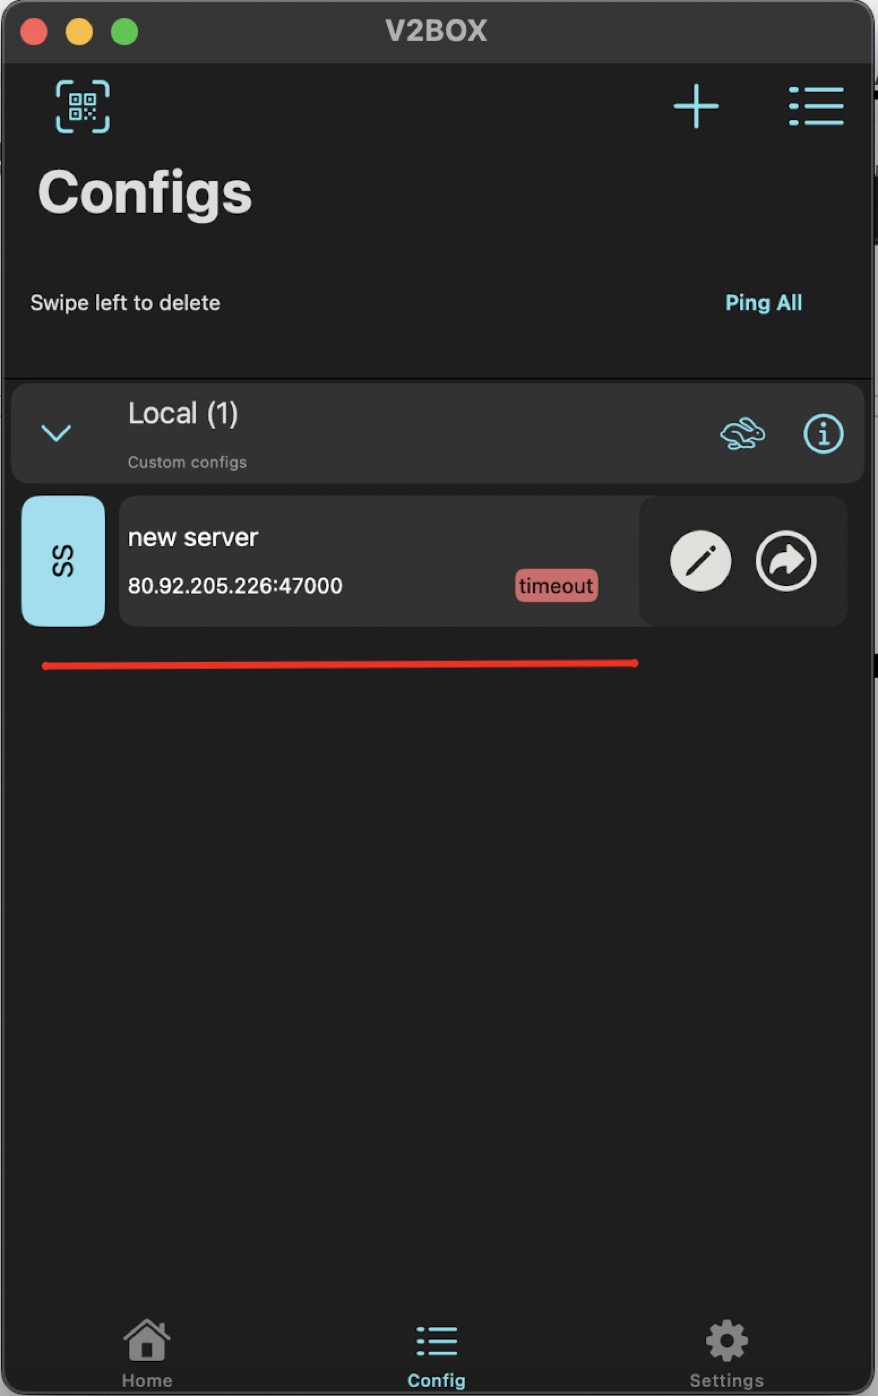
- After adding the “config” in a way convenient for you, you will see that the configuration for the required proxy protocol has appeared.
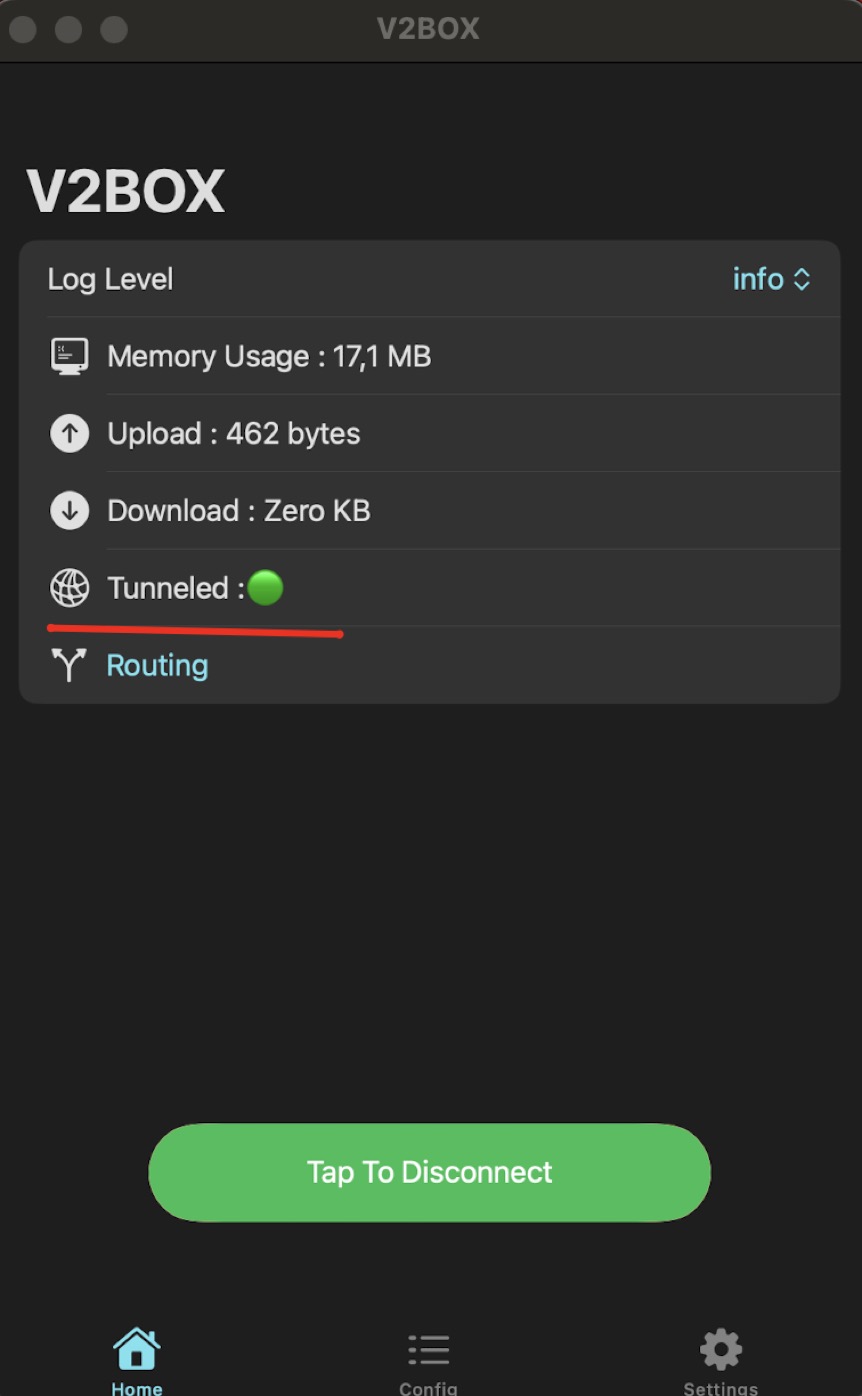
- Go to the “Home” tab where you can click on “Tap To Connect”
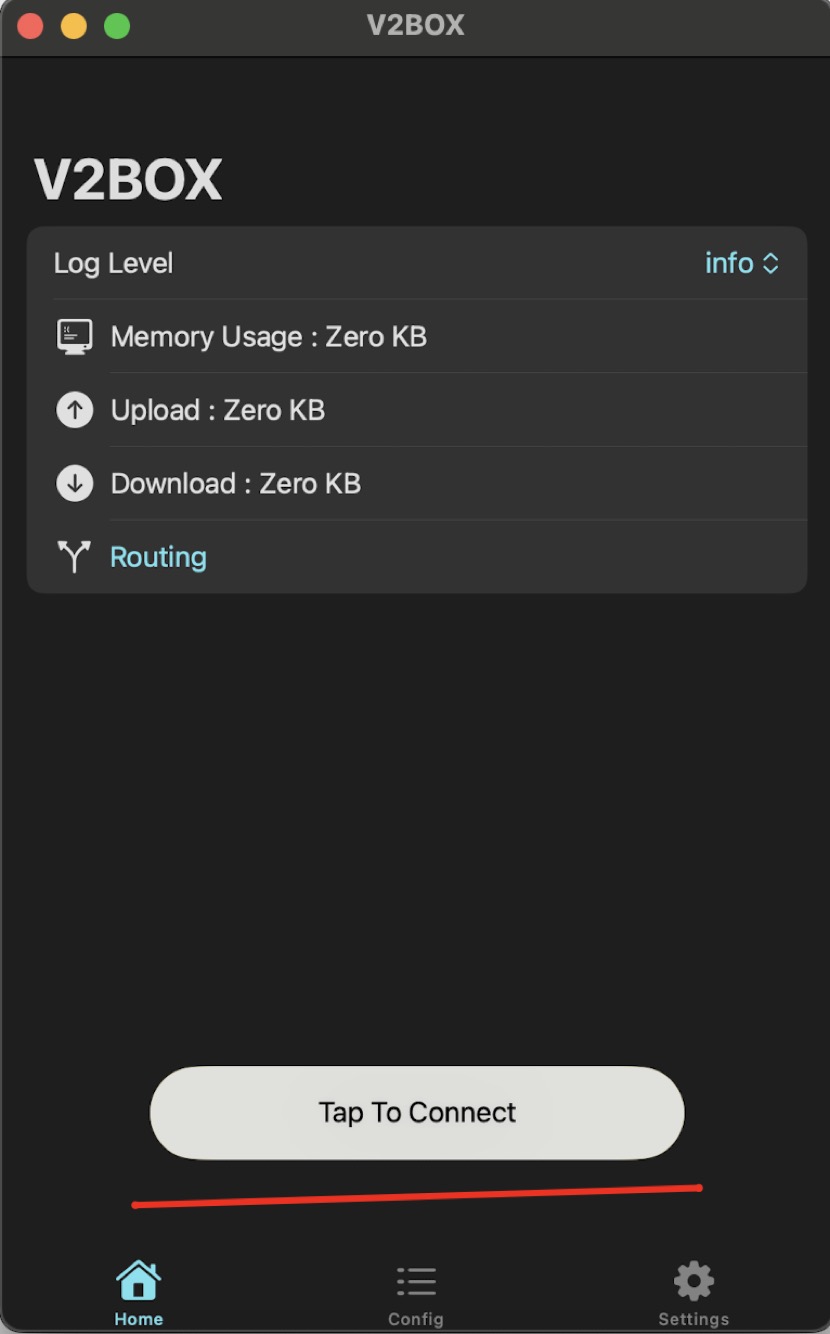
- If everything is set up correctly and the proxy server is working, you will see a green indicator.
Connection Check
Go to whoer.net and check your location and IP. If they differ from your actual ones — the VPN is working.Speed Test
Go to speedtest.net and test your connection speed. Note: speed depends on your region, network, server load, and the chosen speedtest server.Troubleshooting
Connection Issues
- Check your internet connection
- Try a different server
- Restart the app
Slow Speed
- Choose the closest server
- Try a different protocol
- Close unnecessary applications
Startup Errors
- Check app permissions
- Update your system to the latest version
- Restart your device
- Do not use third-party programs that change DNS